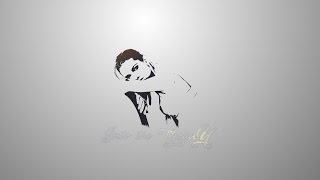
Hey guys. First I just sorry for that intro. I added the wrong file and I was 3 quarters away from the video render to being done and it took a while for this video to render. Ok now that , that is out of the way. In this tutorial I will be showing you how to make a cool signature for forums and such. It's another long video. Sorry about that also. I have been taking a break from the animations the past 2 tutorials. The reason for that is, because I want to try and familiarize a little with the tools in gimp and how to use them. Everything I use you can apply to animations. I have been getting a lot of questions on the tools. So I might be making a few short tutorials on how to use them soon. This tutorial took about a hour to make originally. It might take you more or longer depending on the image you use. The dodge and burn takes the longest. If you really spend your time doing it. You can make things look great in Gimp. You can use dodge and burn in Animations also. Here is the link to download the files. I hope you guys enjoy. I look forward to more to come.
Here is a cool text effect. This tutorial is not a animated tutorial. But it is cool in it's self. It is pretty easy to accomplish and you get great results. You can use this effect for a number of different things. You can put it on your website, use it to make a background for a profile or even your desktop wallpaper. I use filters that is in Gimp to achieve this effect. You will have to download on major thing on this tutorial if you want to follow along and get this effect. It is called Script-Fu. All you need to do is download it and then go to your gimp files and paste it into the script file in the gimp 2.0 main file folder. The site you download it from also gives you instructions on how to instal it. So no worries there. The site that I downloade Script-Fu from is http://www.webupd8.org/2012/05/download-gimp-28-script-fus-pack-more.html
I am also providing you the links to where I downloaded the stock images for the tutorial also.
Here is the link for the Shattered Glass I really hope that you guys enjoy this text effect as there will be more to come.
In this video I am adding a couple of animations in one document. I have been asked a few times on how to do this. So, I made a tutorial on it :) I hope you like it. There are just 2 animations in this tutorial this time. But, it is the same if you added 50. I am making the animations in Gimp. Most people wouldn't think of going to Gimp to make animations, but, I use it a lot. You can make some pretty cool stuff. I also through in a text effect in this tutorial also. It is a neon text effect. I just used some standard presets that were in Gimp to begin with. The glowing neon eefect turned out nice I think. This tutorial is for beginners and more advanced alike. The document size I used on this tutorial is 640 x 400. It is a standard preset in Gimp. I think it is the default document size in Gimp to begin with. I hope to see some pretty cool animations. If you would like you can email us your finished image and we can post it on the site or even showcase it in one of our tutorials. Also, I would like to know if you would like a comment section on the site?
Font - American Captain

